So Vocis can hear you.
Click Grant during onboarding, then Allow in the macOS prompt. If it was denied, open System Settings → Privacy & Security → Microphone and enable Vocis.
Vocis field guide
Everything you need to set up Vocis, shape your words, and get back to work.
Browse the complete guide below.
Start here
Open the downloaded DMG, then drag Vocis to Applications. The download is Developer ID signed and notarized by Apple.
Microphone lets Vocis hear you. Accessibility lets it respond to your hotkey and paste the finished text.
Select the input Vocis should use, then record a shortcut you can reach without thinking. Pick Auto, Toggle, or Hold behavior.
Choose the smaller English-only model or the 99-language model. Vocis stores it on your Mac for private, offline transcription.
Place your cursor in any app, use the shortcut, speak, and stop. Your words should appear there.
Everyday dictation
Put the cursor where you want text. Start your hotkey, speak naturally, and stop. The HUD changes from recording to processing; the transcript appears in the active app and stays on your clipboard.
Permissions
Still on the permission screen? Return to Vocis after enabling the switch. The status should update automatically within a second.
Configuration
In Settings → Configuration, record the main dictation hotkey, choose its activation behavior, set the shortcut used to switch modes, and select an input device. Under Models, choose your speech model. The larger model supports 99 languages and can detect a language automatically or use your preference; the smaller model is English-only.
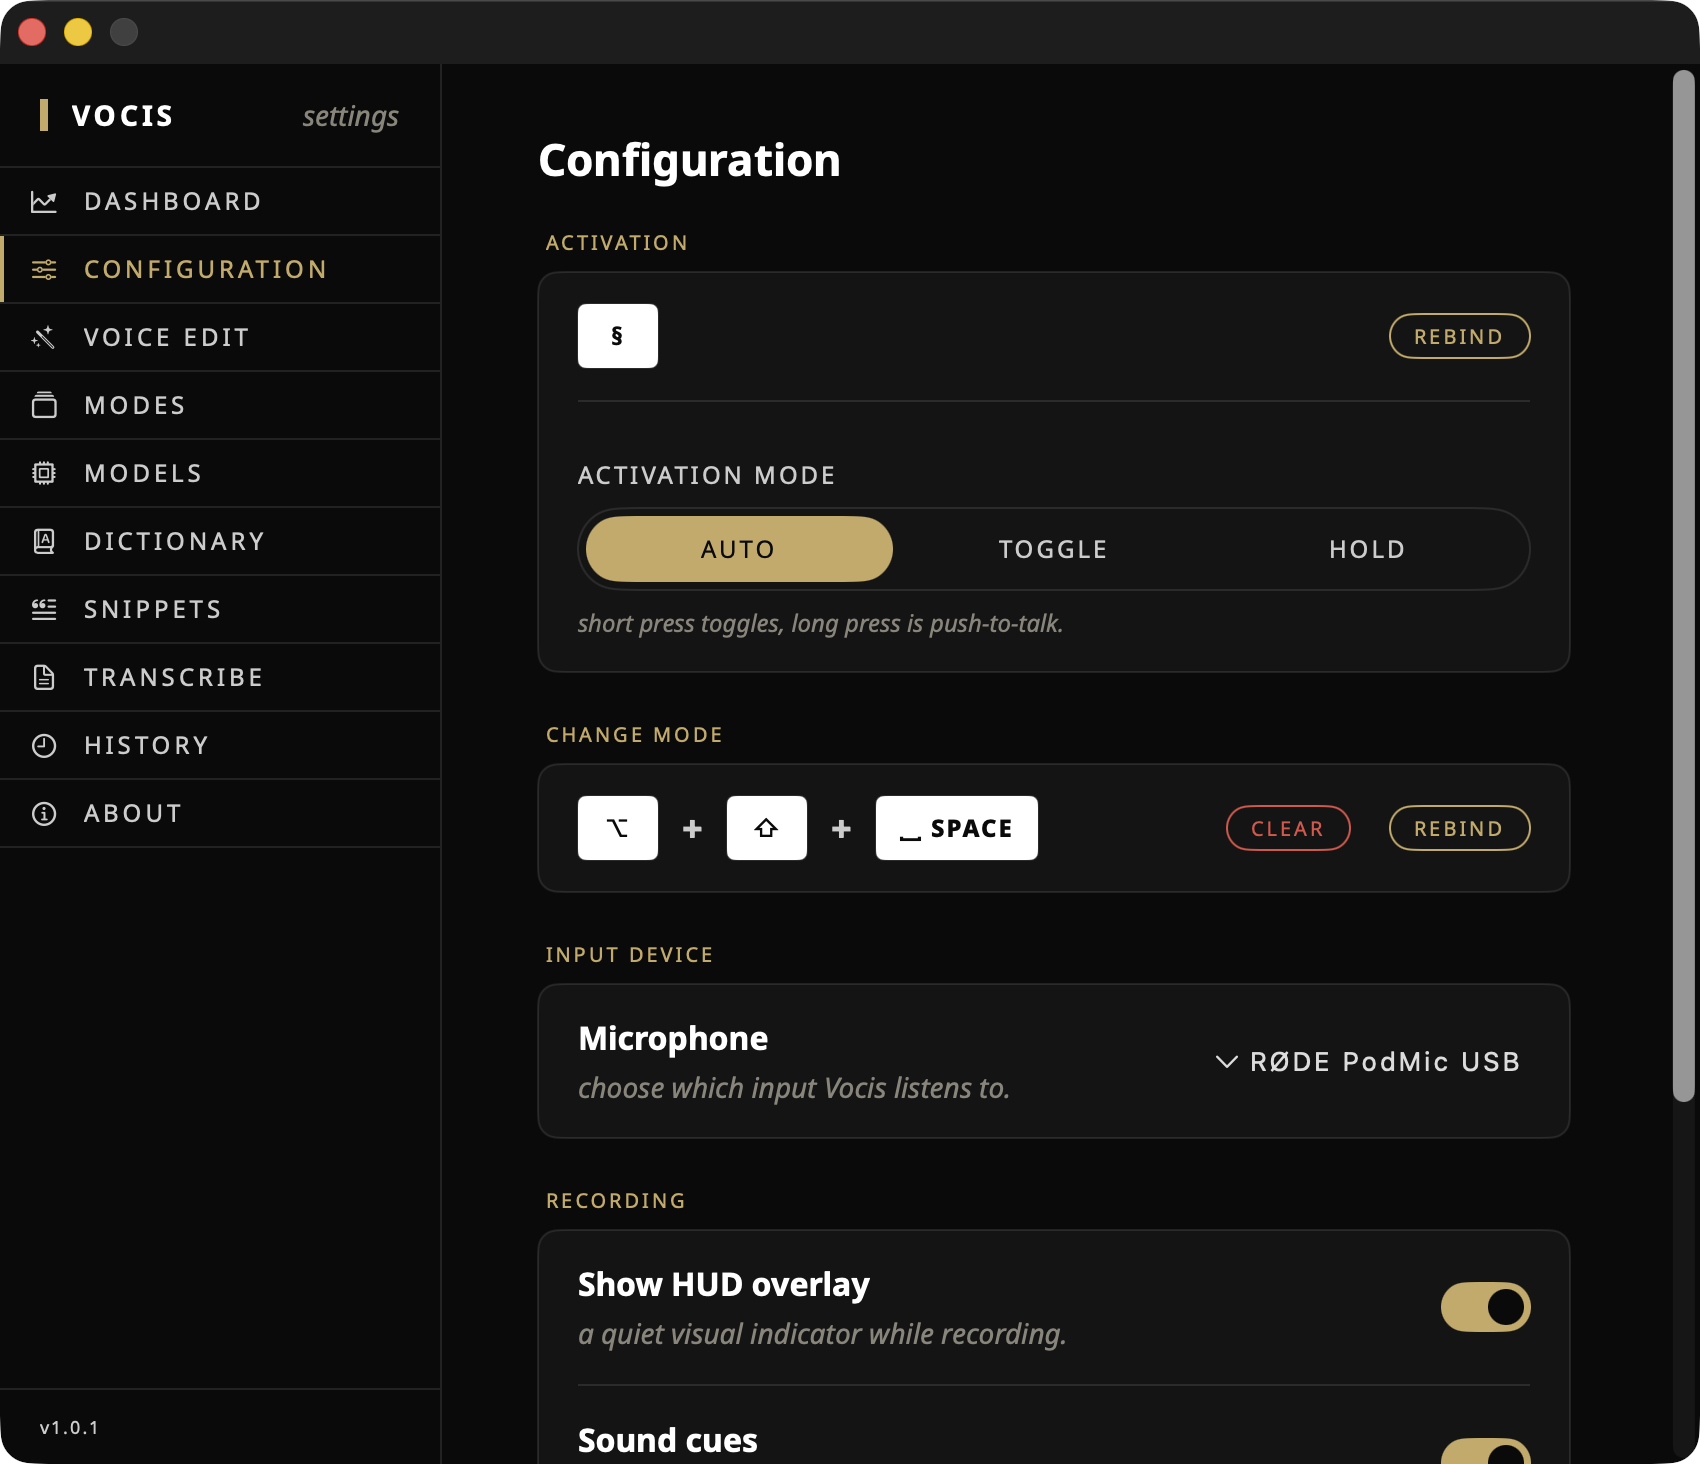
Pick a combination that does not already belong to macOS or another menu-bar utility. Vocis warns when one of its own bindings conflicts. A shortcut using Option or Control plus Space is usually easy to reach.
Modes
A mode pairs a transformation with an optional dedicated hotkey. Keep one raw, make another tidy, use an email preset, or write custom instructions for your own workflow.
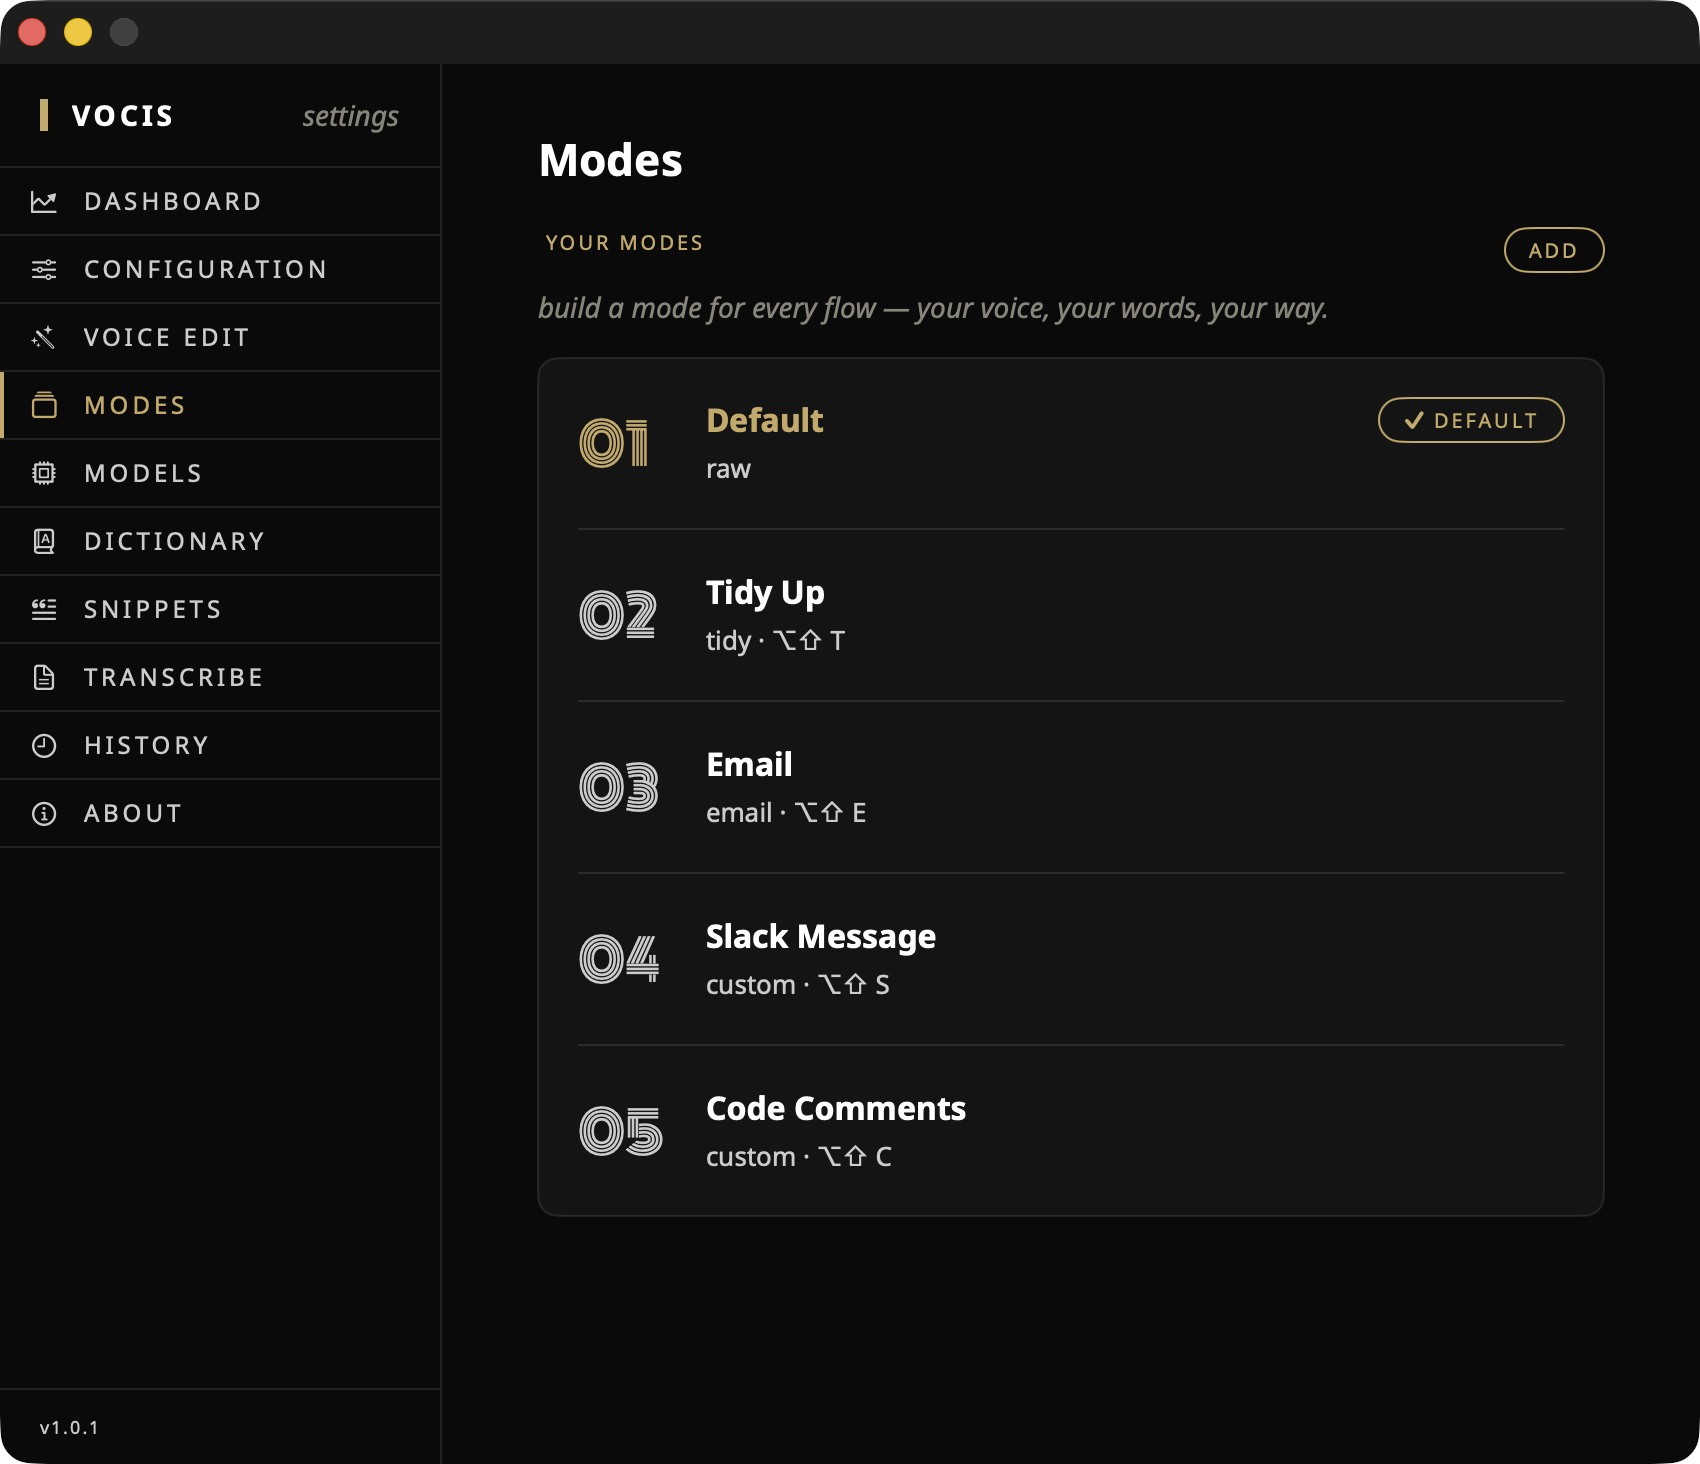
Open Settings → Modes and choose Add.
Name the mode and choose Raw, Tidy, Email, or Custom.
For Custom, write a direct instruction such as “turn this into concise release notes.”
Optionally set it as default or record a dedicated shortcut.
Language model required. Tidy, Email, and Custom use the optional on-device Gemma language model. Download it under Settings → Models before saving a transformed mode. If it later becomes unavailable, Vocis safely delivers the raw transcript.
Writing tools
Dictionary
Add a frequently misheard original and the replacement you expect. “chat gpt” can become “ChatGPT”; a colleague’s name can keep its proper spelling.
Applied silently after transcription.Snippets
Pair a spoken trigger with reusable text. Saying “my sign-off” as the whole utterance can insert an entire signature block.
Triggers match whole utterances to avoid accidents.Voice Edit
Select text in any app, start the Voice Edit shortcut, describe the change, then stop recording to replace it.
Shorten, reshape, or translate without retyping.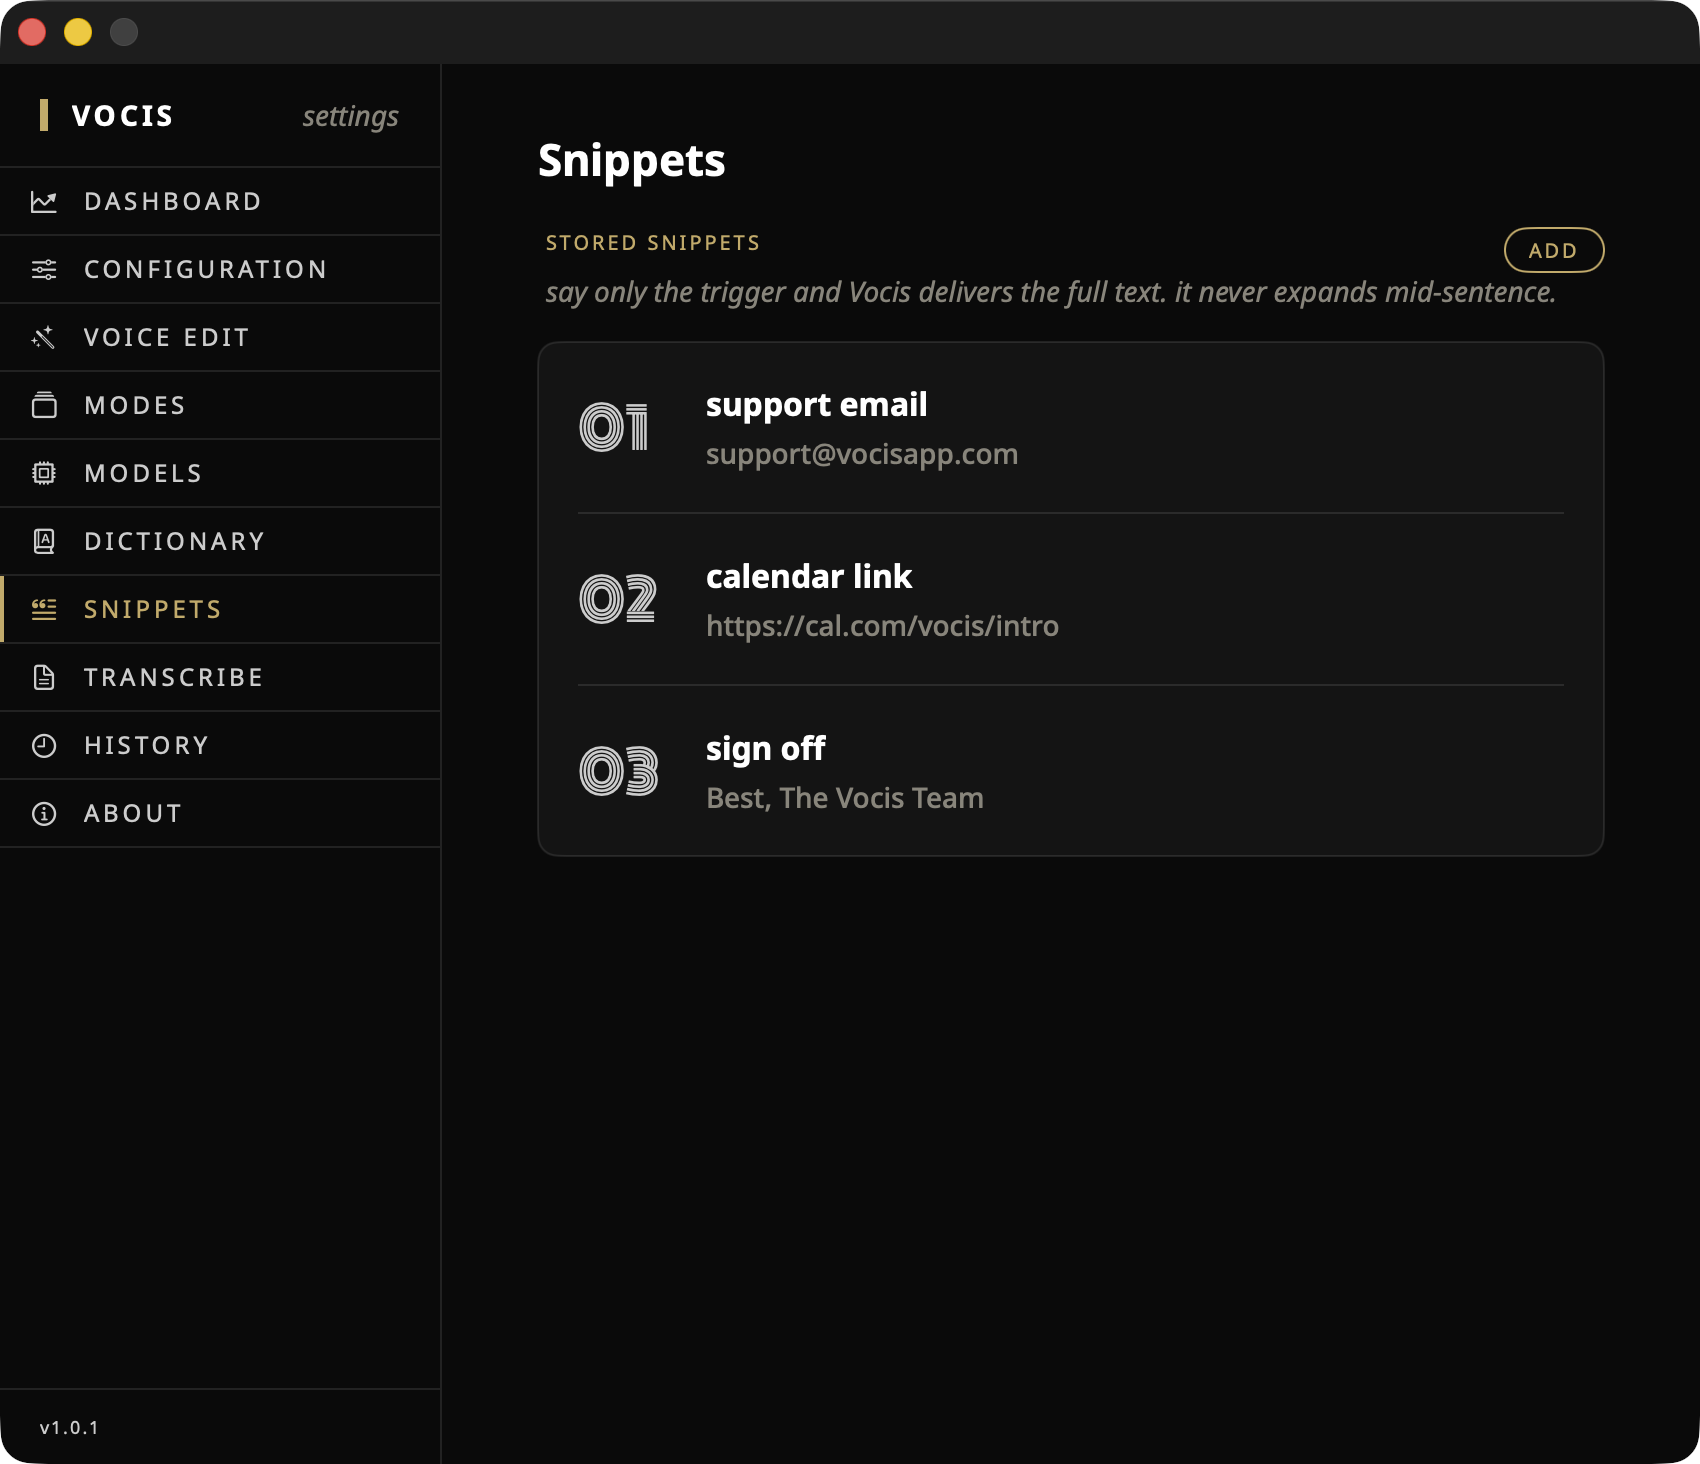
Voice Edit
Voice Edit revises text that is already on the page. Select a passage in any app, speak the result you want, and Vocis rewrites the selection in place with the on-device AI model.
Open Settings → Models and download the AI model. Voice Edit runs locally and needs this model to rewrite text.
Open Settings → Voice Edit, turn on Enable Voice Edit, then record a shortcut that does not conflict with another binding.
In any editable app, select the exact text you want to revise. Start recording with the shortcut, say your instruction, and stop using your chosen Auto, Toggle, or Hold behavior.
Your original is protected from failed rewrites. The selected text is processed locally. If the AI model cannot complete the edit, Vocis leaves the original text unchanged.
Files & history
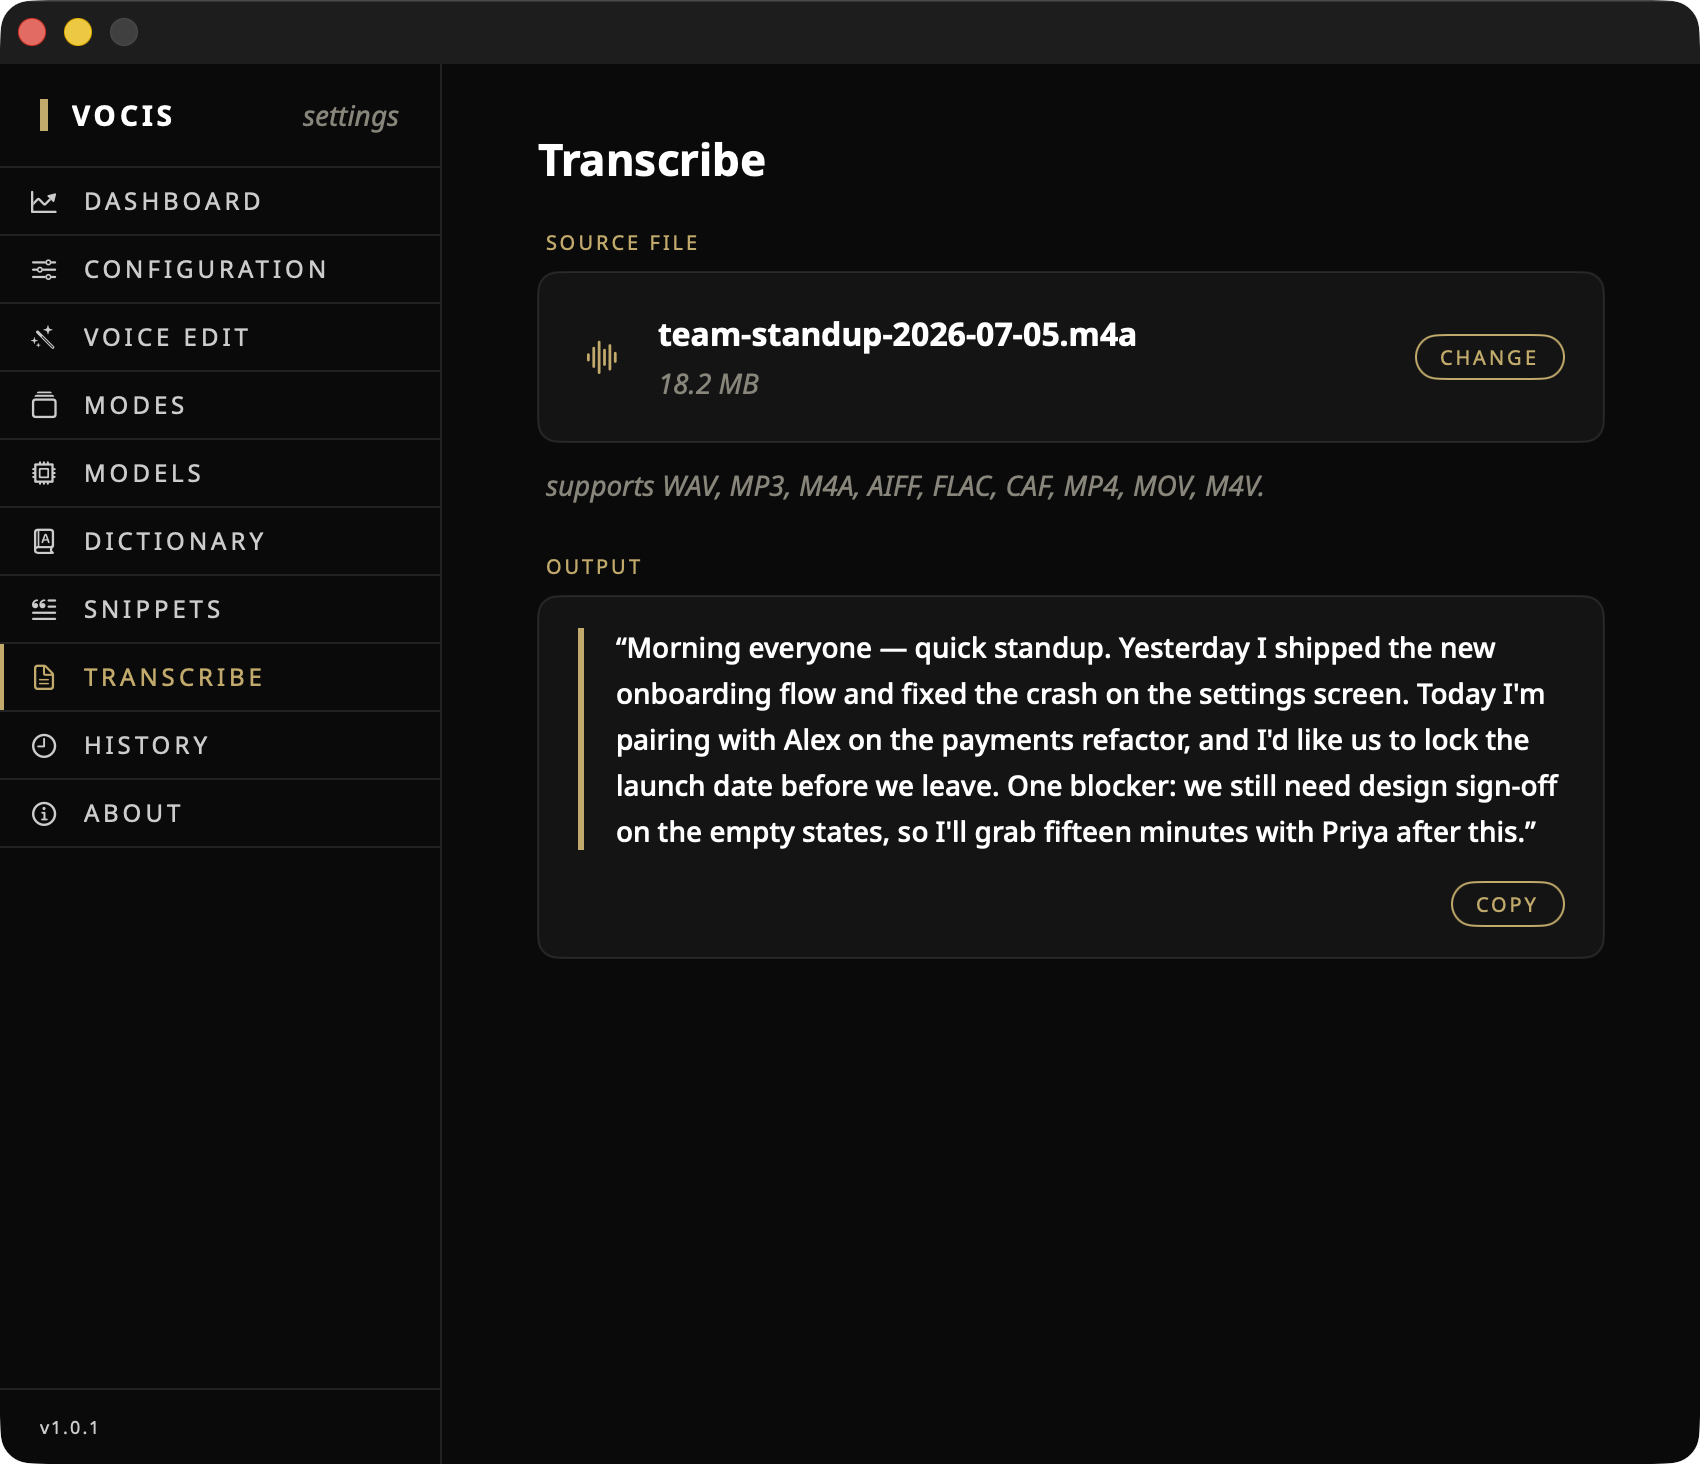
Open Settings → Transcribe, select an audio or video file, then choose Transcribe. Vocis supports WAV, MP3, M4A, AIFF, FLAC, CAF, MP4, MOV, and M4V. Copy the completed output when it is ready.
History stores up to 100 recent text transcripts locally. Turn Save History off, remove individual items, or clear everything. Completed transcripts remain on the clipboard after insertion.
Troubleshooting
Open Settings → Configuration and record the shortcut again. If Vocis reports a conflict, choose a different combination. Confirm Accessibility is enabled, then quit and reopen Vocis if macOS has not applied the permission change.
Check System Settings → Privacy & Security → Microphone. Then choose the intended input under Settings → Configuration. If a headset was disconnected during recording, stop and begin a new dictation after reconnecting it.
Confirm Accessibility permission is enabled and that a writable text field had focus before you dictated. Your transcript may still be on the clipboard; try Command-V. Some secure password fields intentionally reject automated paste.
Open Settings → Models and download the Gemma language model. Vocis deliberately falls back to the raw transcript when the transformation model is unavailable, so your words are never lost.
Vocis releases large models after extended inactivity to return memory to the rest of your Mac. The next dictation reloads the required model automatically; following dictations should be faster.
Open Settings → About → Support and choose Export beside Diagnostics. Attach the saved text file to your email. It contains app and system state plus operational events—not recordings, transcripts, clipboard contents, snippets, dictionary entries, or prompts.
Still stuck?
Send us what happened, what you expected, your macOS version, and—if relevant—the diagnostics file exported from Vocis.
support@vocisapp.com ↗No matching guide sections. Try a broader word, or email support@vocisapp.com.